
Hiring the right team for your home addition is like putting an experienced crew at the helm. They juggle schedules, budgets and quality under one umbrella—so you can relax knowing every detail is tracked.
Think of your contractor as the captain of your renovation ship. They chart the design course, coordinate every trade and navigate the permit process on your behalf.

In the Greater Toronto Area, median home prices hit $909,400 in 2025, which means adding on can often cost less than moving to a new neighbourhood.
By laying out a clear checklist, you’ll be able to compare bids at a glance and zero in on the best fit for your project.
Key Takeaway: Contractors should provide transparent estimates and realistic timelines.
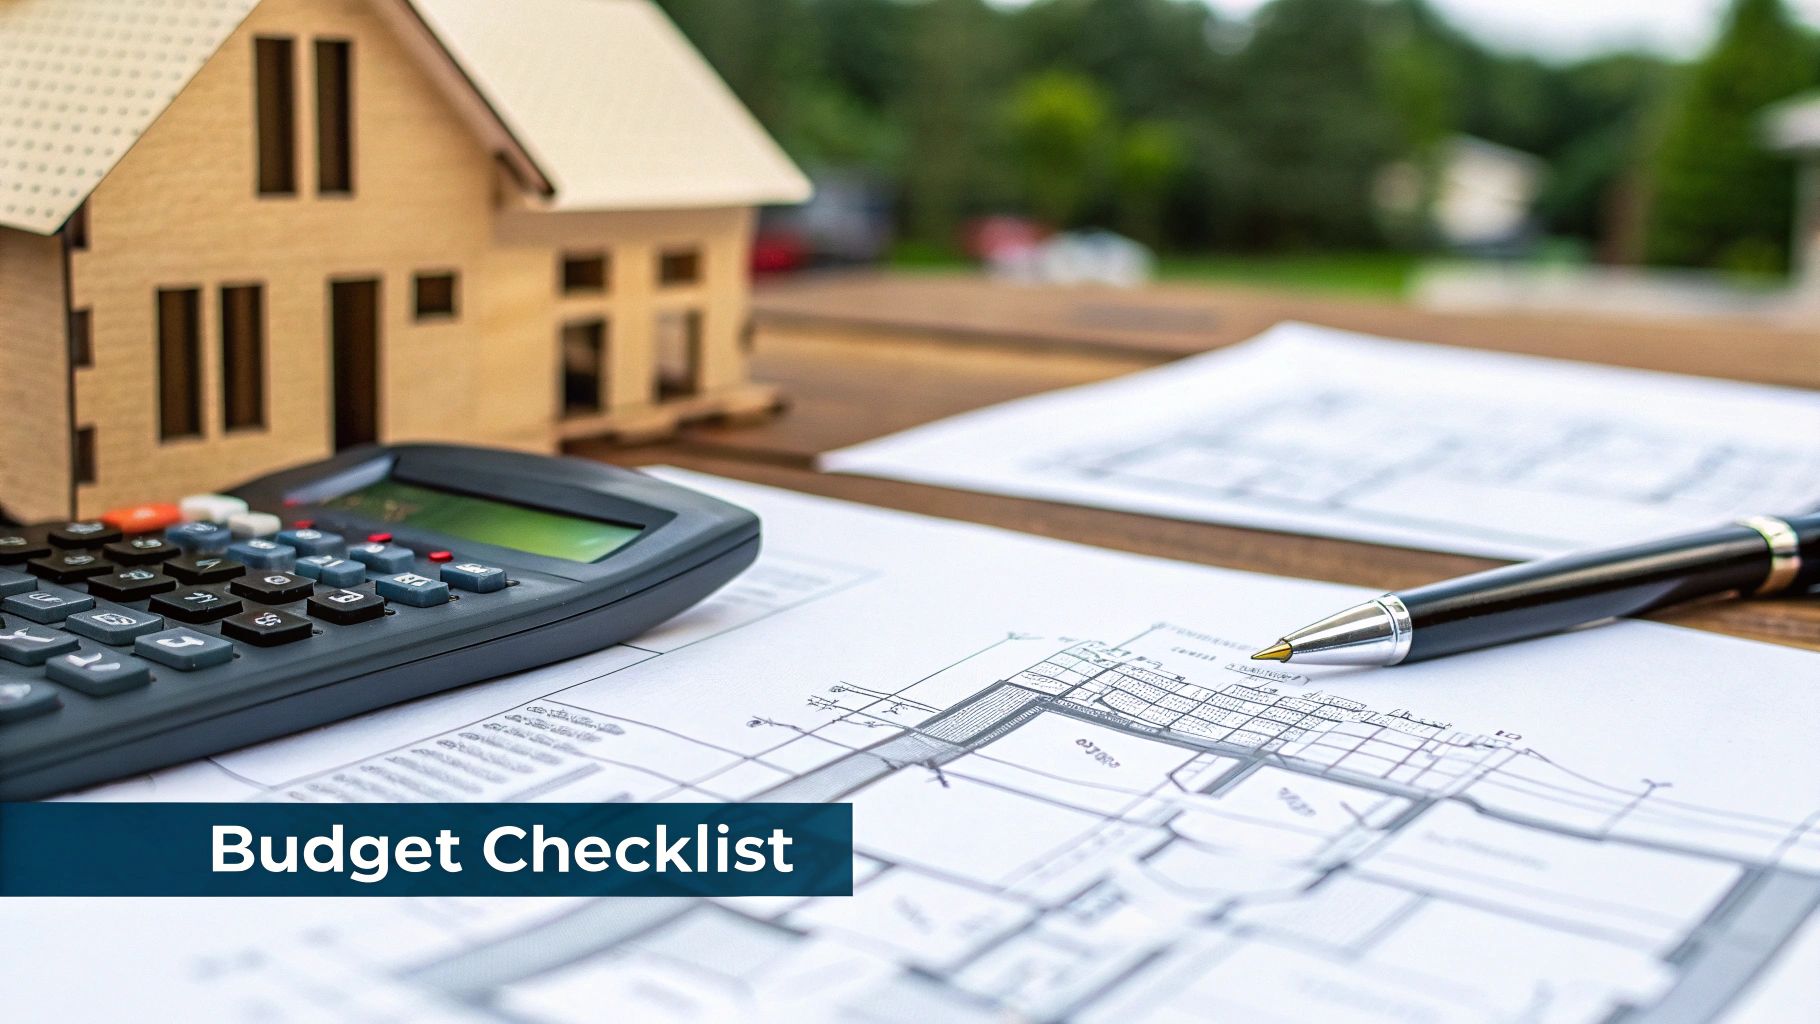
Core Evaluation Factors
| Factor | What to Evaluate |
|---|---|
| Project Scope | Your goals, room dimensions and must-have features |
| Delivery Model | General contractor vs. design-build agreement |
| Permit Requirements | Local zoning bylaws, permit fees and inspection timelines |
| Timeline | Approval phases, build duration and possible roadblocks |
| Budget Planning | Cost per square foot, contingency cushions and payment milestones |
Quick Steps To Compare Bids
- Outline your vision in writing before you reach out.
- Line up timelines and cost breakdowns side by side.
- Check credentials, licences and online reviews.
Pre-Bid Checklist
- Check valid licence and insurance documents.
- Review past addition examples in their portfolio.
- Speak with former clients for honest feedback.
- Confirm they’ve handled permits in your municipality.
You might also enjoy browsing real-world projects in our Castlegrove Construction Portfolio.
Starting with these evaluation points will narrow your list to only the most qualified bidders. That way, you sidestep common hiccups and head into contract negotiations fully prepared.
With a structured approach from scope to budget, you’ll reduce guesswork on timelines, deliverables and overall cost—keeping surprises to a minimum.
Understanding Contractors For Home Additions
Think of a home addition contractor as the conductor of an orchestra, coordinating every note from site review to the finishing touches. They juggle structural checks, architectural sketches, tradespeople’s schedules and city code inspections.
These professionals turn big ideas—like transforming an attic into a bright bonus room—into spaces that feel natural and functional. Their secret? Precise timing, clear communication and deep know-how of Toronto’s unique building scene.
Initial Consultation And Assessment
It all starts with a thorough site visit and an open conversation. The contractor walks your property, notes property lines, locates hidden utilities and spots challenges you might not see.
At this stage, you’ll:
- Define goals such as a home office or guest suite
- Preview costs at $150 to $350 per sq ft
- Check load-bearing walls and access points
- Sample materials—hardwood, tile or paint palettes
Essential Services During Preconstruction
Before a shovel ever hits dirt, your contractor dives into feasibility:
- Structural studies that highlight any constraints
- Permit packages tailored to Toronto bylaws
- Detailed, transparent estimates with line-item costs
- A clear schedule to track each subcontractor
For instance, converting an attic into a liveable space means evaluating joist strength, insulation upgrades and egress requirements to ensure everything’s code-compliant.
Expert Insight
A well-structured feasibility study cuts rework by up to 40%, speeding projects on average by two weeks.
Managing Trades And Timelines
Once permits are in hand, milestone dates guide framing, electrical, plumbing and finishing work. A good contractor books each trade in sequence so roofers wrap up before drywall crews arrive, keeping everything flowing smoothly.
They also:
- Confirm permit issuance and inspection dates
- Coordinate plumbing and electrical sign-offs
- Align material deliveries with on-site teams
- Track progress against set milestones
In Toronto, this includes syncing with city inspection windows and renewing permits before expiry to avoid any work stoppages.
Integrating Plans With Construction
A contractor’s job is to translate blueprints into real-world tasks. They scrutinise window heights, beam connections and fixture spots, then call in masons, carpenters and installers exactly when needed.
On an attic upgrade, for example, they map rafter intersections with existing trusses and adjust on the fly. This hands-on approach keeps change orders—and extra costs—to a minimum.
In California, the remodeling industry has grown to 90,915 businesses as of 2025, expanding at 3.4% annually from 2020 to 2025. Learn more in the IBISWorld California Remodeling Report.
Final Finishes And Quality Assurance
As work winds down, the focus shifts to paint, trim and a thorough clean-up. Contractors run punch-list walk-throughs to confirm every detail matches your specifications and Toronto bylaws.
They also manage warranty schedules, lining up post-completion inspections with suppliers and relevant city officials. The result? Fast responses to settling cracks or minor leaks.
Cost Management And Risk Control
Budget transparency is key. Your contractor will outline labour, materials and contingency reserves, then review spending weekly with you to keep surprises at bay.
Keep in mind:
- Allocate 10–15% contingency for hidden issues
- Compare multiple material quotes for best rates
- Monitor expenses against project milestones
- Use a clear change-order form to approve extras
When unexpected termite damage appeared in a century-old home, the contingency fund covered repairs without pushing back the final finishes.
Warranty And Aftercare
A reliable contractor views the project as just the beginning. Scheduled inspections at 30, 90 and 120 days catch settling cracks or paint mismatches early—at no extra cost to you.
This aftercare solidifies trust and ensures your new space performs as promised.
Regular Communication And Progress Updates
Weekly site meetings are non-negotiable. Photo reports, updated timelines and quick huddles keep homeowners and trades aligned.
In one kitchen extension, a framing misalignment was spotted in a progress photo, fixed in minutes and addressed before drywall went up. This honest, ongoing dialogue protects your budget and builds confidence in the process.
Contact Castlegrove Construction today.
Comparing Delivery Models For Home Additions
When you’re planning a home addition in Toronto, the delivery model you choose shapes every step—from how you talk with your team to who’s on the hook for unexpected expenses. It’s not just a label. It’s the difference between juggling multiple vendors or handing one firm the keys to your project.
Here’s what we’ll explore:
- Who’s responsible at each phase
- How information flows and who your main contact is
- Budget certainty and who eats cost overruns
- Scheduling, inspections and permit coordination
General Contractor Model
With the general contractor route, you assemble a lineup of professionals—architects, engineers and builders—each hired separately. It feels a bit like conducting an orchestra. You set the rhythm, making sure bids come in, contracts get signed and permits go through for each trade.
You’ll handle:
- Collecting and comparing multiple estimates
- Booking inspections and chasing approvals for each permit package
- Acting as the liaison between your designer and the on-site crew
Because roles are siloed, you carry the risk if designs change or budgets stretch. And if an inspector flags an issue, your timeline can wobble.
Design Build Model
By contrast, a design-build firm wraps design and construction together under one umbrella. Imagine one partner steering the ship from first sketch to final coat of paint. Lines of communication tighten up, and you deal with just one contract.
Key benefits include:
- Early price verification for fixed-price agreements
- Faster permit applications thanks to integrated teams
- Single-source accountability for quality and timing
“Design build projects can reduce timelines by up to 33% compared to separate contracts.”
Visual Decision Guide

This chart lays out how we move from feasibility studies through permit approvals, then into construction and finishing touches. It’s the roadmap that keeps projects on track.
Comparison Of Delivery Models
Below is a side-by-side overview of how each approach addresses core project elements.
| Feature | General Contractor | Design Build |
|---|---|---|
| Responsibility | Owner hires and manages trades | One firm handles everything |
| Communication | Multiple points of contact | Single point of contact |
| Cost Certainty | Estimates can shift | Fixed price issued early |
| Timeline Coordination | Dependent on separate schedules | 33% faster approvals and hand-off |
You’ll notice design-build packs accountability and predictability into one package, while the general contractor route offers more flexibility if you expect to tweak details mid-project.
Making Your Choice
Deciding which path to follow depends on how hands-on you want to be, your tolerance for budget variance and how important a tight timeline is. Ask yourself:
- Do I want a single partner steering the entire ship?
- Can I manage multiple vendors and shifting estimates?
- How critical is a guaranteed schedule and price?
- Am I comfortable handling design changes on the fly?
If you lean toward streamlined budgeting and one-stop communication, explore Castlegrove Construction’s design build process for a closer look at how we simplify permits, plans and builds.
Next up, we’ll dive into Toronto-specific permit requirements and inspection timelines to keep your addition compliant and on schedule.
Navigating Permits And Codes For Home Additions
Getting your Toronto home addition approved can feel like navigating a tangled web of rules and deadlines. Working with contractors who know this city inside out keeps your project on track and steers clear of unexpected stoppages.
Toronto’s zoning bylaws cover everything from building height to property setbacks. On top of that, heritage overlays and conservation districts often demand extra sign-offs before you break ground.
- Zoning Review for land classification and any required variances
- Building Permit applications, backed by drawings from architects and engineers
- Heritage Overlay consents when your home sits in a designated district
- Inspection Scheduling across framing, electrical, plumbing and final review
Preliminary Site Plans And Submission
The first real hurdle is submitting a complete set of site plans. Detailed surveys and crisp drawings help you avoid endless back-and-forth with city staff.
- Obtain a topographical survey from a licensed surveyor.
- Partner with your home-addition contractor to draft site and elevation drawings.
- Use the city’s e-portal for electronic submission—no courier delays.
Below is a snapshot of Toronto’s online permit portal showing key application steps.
This view highlights sections like project summary, site details and fee calculations. Checking your fee estimate before hitting “pay” prevents rejected submissions over the wrong fee items.
Interestingly, approvals in H1 2025 fell 16% below average, with only 49,400 housing units cleared—signalling growing retrofit opportunities for home additions. Learn more in AGC-CA’s 2025 Industry Outlook.
Accelerating Approvals With Expert Tactics
Seasoned home-addition teams often pre-register permits even before final drawings are locked in. That buffer shaves weeks off your overall timeline.
Fast-tracked engineered drawings, stamped by a professional engineer, can cut approval time by up to 30%.
| Stage | Typical Duration | Contractor Tip |
|---|---|---|
| Zoning Review | 4–6 weeks | Pre-submit variance requests |
| Building Permit | 6–8 weeks | Lodge a complete package |
| Final Inspections | 2–3 weeks | Book early slots online |
A quick portal check after two weeks flags potential issues—missing engineer stamps or unsigned declarations are the usual bottlenecks. Contractors familiar with Toronto codes will chase reviews and set automated reminders for renewals.
Collaborating With City Inspectors For Final Signoff
Booking inspections early prevents last-minute scrambles at project close.
- Schedule framing, electrical and plumbing inspections as soon as your permit is granted
- Review each inspector’s checklist online so you’re ready before they arrive
- Post clear site signage to speed up inspector arrivals and reduce any mix-ups
Final signoff unlocks your occupancy permit—and your new living space. With smart permit tracking, your contractor keeps work flowing and prevents code violations.
Castlegrove Construction’s team brings two decades of Ontario Building Code expertise to every project. We pre-register your plans, fast-track structural drawings and keep direct lines open with city staff. Clear fee estimates, proactive portal checks and strong city relationships mean surprises stay out of your build.
Next, we’ll discuss realistic cost ranges and decision checklists to budget with confidence.
Avoiding Common Submission Errors
Before you hit “submit,” double-check every field against your surveyor’s and engineer’s documents. Small oversights can stall your entire application.
- Missing signatures or seals
- Outdated or mismatched drawings
A quick peer review catches those pitfalls before you lodge your package. Many contractors rely on custom checklists to make sure every code item is addressed. Proper file naming and version control keep your portal uploads organised—and approvals moving.
Realistic Home Addition Costs And Decision Checklist
Renovating in Toronto without a clear budget is like setting sail without a map. Whether you’re extending a bedroom, tucking in a secondary suite, converting a garage or enlarging a kitchen, knowing realistic costs keeps unwelcome surprises at bay. Below, we break down per-square-foot benchmarks and highlight the extra fees that often slip under the radar.
Typical Cost Ranges
Most bedroom additions fall between $200 and $350 per square foot, depending on the finish level and structural tweaks.
A kitchen extension generally lands in the $300 to $480 per square foot range once you factor in bespoke cabinets, high-end appliances and mechanical upgrades.
Secondary suites run about $250 to $400 per square foot, thanks to separate heating and plumbing. Garage conversions start near $180 per square foot, climbing to $270 when you add insulation and full electrical wiring.
Keep in mind, these figures exclude:
- Foundation upgrades: $15,000 to $30,000 depending on soil conditions
- Utility rerouting (gas/water lines): $5,000 to $10,000
- Site access improvements (driveway mods): $2,000 to $6,000
- A 10–15% contingency for unforeseen structural repairs
Accurate budgeting depends on evaluating all site variables before any work begins.
Checklist For Smart Decisions
- Clarify must-haves vs. nice-to-haves.
- Compare premium finishes (hardwood, stone) with practical upgrades (extra storage, energy-efficient windows).
- Reserve at least 10% of your budget for hidden costs.
- Gather three or more detailed quotes to compare apples to apples.
- Confirm each quote outlines labour, materials and permit fees.
This approach helps you balance dream features with essential infrastructure.
Tips To Avoid Surprise Expenses
A thorough site analysis up front can uncover issues like hidden rot or unexpected load-bearing quirks. Partnering with an experienced home-addition contractor also ensures your utility-rerouting plan is solid.
- Lock in fixed-price agreements for major trades.
- Review change-order policies so you know how extras are handled.
- Hold bi-weekly budget reviews with your contractor.
- Keep communication open through weekly on-site meetings and photo logs.
Proactive cost control keeps your renovation predictable and on track.
Cost Factors And Advice
| Cost Factor | Budget Advice |
|---|---|
| Structural Reinforcement | Commission an engineer’s report early on. |
| Permit and Inspection Fees | Check the City of Toronto portal for up-to-date rates. |
| Material Selections | Source at least three supplier quotes before ordering. |
| Labour Costs | Tie payments to clear, phased milestones. |
By following this checklist, you can balance design goals with essential upgrades, catch hidden fees before they surface and make choices that deliver long-term value.
At Castlegrove Construction, our budgeting process guides you through every decision, ensuring your dream design aligns with a realistic financial plan. Up next, we’ll explore how our structured timeline keeps progress smooth and spending predictable at every stage.
Real Project Example
A midtown Toronto family converted their rear garage into a nanny suite (approximately 12 x 10 ft). They scoped $40,000 for base construction but uncovered termite damage that added $12,000.
- Structural repairs (joist replacement): $12,000
- Permit and inspection fees across three stages: $3,200
- Utility reconnection (water and gas): $4,500
- Final cost: $60,000, matching the revised estimate thanks to a 15% contingency
A well-funded contingency is your best safeguard against hidden surprises.
With clear checklists and real-world examples, you’ll build a budget that reflects genuine on-site conditions and keeps unexpected costs at bay.
Key Interview Questions And Red Flags
Your first conversation with a contractor sets the entire vibe for your home addition. Treat it like a first date: you’re listening for compatibility, honesty and shared expectations. A clear, written record of answers helps you measure each candidate objectively—and keeps everyone on the same page.
Below are 10 focused questions to guide your discussions. Jot down the responses to build a solid reference point when comparing bids.
Licensing And Insurance Questions
- 1. Can you provide your Ontario building licence number and proof of registration? Confirming credentials up front shields you from regulatory headaches.
- 2. What bonding and liability insurance coverage do you carry? Ask for policy limits so you’re not stuck with repair or medical bills if something goes wrong.
Cost And Process Questions
- 3. Can you share a detailed copy of your change-order policy? This document shows how extra work or tweaks translate into added costs.
- 4. How do you schedule trades and manage delays? A realistic timetable, and a plan B for hiccups, keeps your renovation on track.
- 5. What is your typical payment schedule and retainage clause? Knowing when payments are due—and what’s held back—prevents surprise invoices.
Client References And Dispute Questions
- 6. Can you provide references from past home‐addition projects? Hearing from former clients reveals strengths—and any recurring pitfalls.
- 7. How do you resolve disputes or unforeseen issues? A clear, step-by-step process stops small problems from snowballing.
- 8. Do you handle permits and inspections in-house or via subcontractors? Pinpointing responsibility ensures nothing slips through the cracks.
- 9. What warranty do you offer on labour and materials? A strong warranty means you’re not left hanging if cracks or leaks appear after move-in.
- 10. How do you communicate progress and changes with homeowners? Routine updates—calls, texts or site photos—keep everyone aligned.
These questions dig into scheduling, cost adjustments and conflict-resolution styles. Next, we’ll spotlight warning signs that hint at trouble ahead.
Warning Signs To Watch For
- Vague or shifting timelines without clear explanations can mask overbooked trades.
- Bids far below market rates may hide missing line items or low-grade materials.
- Reluctance to share references or project photos suggests past clients weren’t happy.
- No written change-order policy leaves you exposed to unchecked cost overruns.
- Delayed proof of insurance or bonding details should set off alarm bells.
“We hired one builder who glossed over permit details and ended up with a $15,000 penalty,” recalls a Toronto homeowner. “That red flag should have stopped us in our tracks.”
Record every answer and line them up side by side. This custom checklist makes it simple to shortlist contractors who communicate clearly and stand behind their work.
How To Document Answers Effectively
Think of your notes as a scoreboard—a side-by-side comparison that highlights strengths and weaknesses at a glance. A basic spreadsheet or interview form does the trick.
- Step 1 Create a template with columns for Question, Answer and Date. This keeps details neat.
- Step 2 Send the template ahead of each meeting. It signals you’re organised—and expects transparency.
- Step 3 Jot down concise notes or record key phrases. Flag vague or evasive replies on the spot.
- Step 4 Rate each response on a simple scale (for example, 1–5). This removes guesswork.
- Step 5 Follow up on any gaps before signing the contract. It holds the contractor accountable.
Spending five minutes per interview on this process can save thousands of dollars—and countless headaches—later on.
After scoring each candidate, choose the contractor with the clearest answers and highest overall rating. For expert help vetting and managing your home-addition team, reach out to Castlegrove Construction. With over 20 years of experience in Toronto, we make sure your interviews, contracts and timelines are rock solid.
Begin your project with confidence—spot communication breakdowns early and keep costs from spiralling.
Frequently Asked Questions
When you’re planning an addition, questions come fast and furious. This section cuts through the clutter with clear, Toronto-focused answers.
We’ve tailored each response to local building codes and practical know-how. Think of it as your roadmap for a smooth home-addition journey.
What Qualifications Should I Look For In Contractors For Home Additions?
You want someone with a valid Ontario building licence, solid liability insurance and a proven track record on projects just like yours.
Treat references like gold: ask for three references, then reach out. Don’t forget to glance at local consumer-protection records for any lingering complaints.
How Long Does A Typical Home Addition Take In Toronto?
A simple single-bedroom or small suite usually wraps up in about 8 to 12 weeks, permits included.
If your house has heritage overlays or you’re shifting major walls, factor in around 16 weeks or more. It’s much like baking a layered cake—complexity adds time.
Toronto Permit Resources
What Is The Permit Process Timeline For A Home Addition?
Expect roughly 4 to 8 weeks for zoning review and permit issuance, depending on city workloads. If your contractor comes armed with permit-ready drawings, you might shave off a couple of weeks. After construction wraps, finishing inspections can tack on another 2 to 3 weeks.
How Can Homeowners Ensure Cost Transparency Throughout The Project?
Treat your budget like a clear window—no fogged-up surprises.
- Ask for a detailed line-item estimate covering labour, materials and fees.
- Confirm a clear change-order policy so added work doesn’t blindside you.
- Insist on regular budget updates at each milestone.
- Use retainage clauses to hold back final payment until everything passes inspection.
“Regular, open communication is the best defence against surprise expenses.”
For more intricate additions, schedule bi-weekly budget reviews. That way you stay in the driver’s seat.
Expert Insights
By combining licensing checks, realistic timelines, transparent budgets and the right permit strategy, you’ll navigate Toronto’s renovation scene with confidence. Avoid the usual pitfalls and keep your project on track from blueprint to ribbon-cutting.
Ready to move forward without guesswork? Contact Castlegrove Construction for expert guidance on your next home addition.